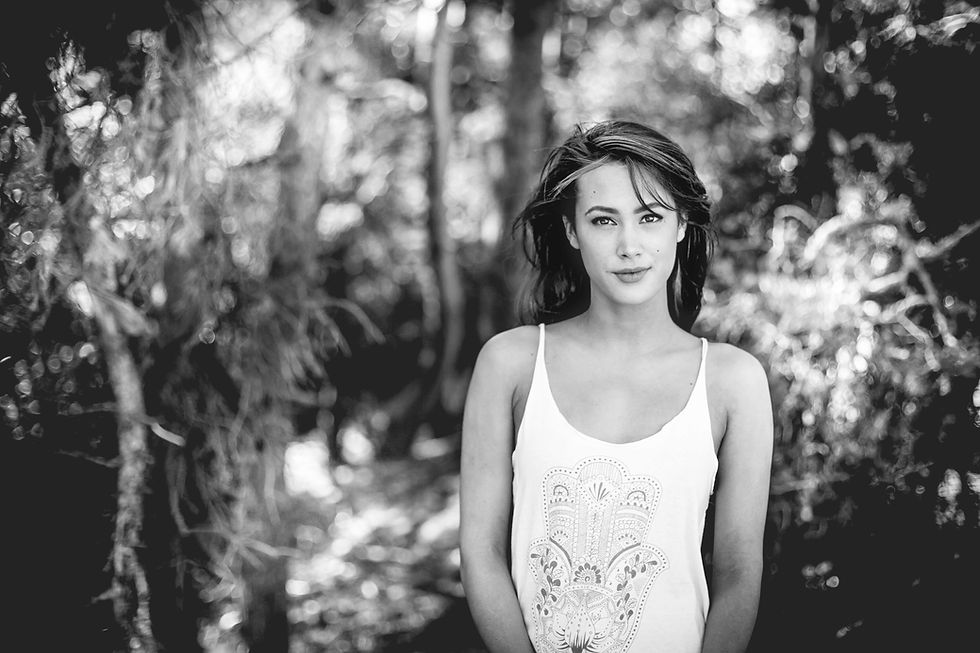
Best Camera Settings for Portrait Photography (With Examples)
- Shawn Eastman

- Jun 9, 2025
- 9 min read

Portrait photography is one of those magical genres where technical know-how meets creative expression. Whether you’re capturing someone’s essence in a close-up headshot or a lifestyle portrait shoot out in the wild, getting your camera settings right can absolutely make or break the shot. And as a professional photographer who’s spent countless hours behind the lens, I’m here to share exactly what settings I use (and why), plus when and why you might want to tweak things depending on your subject, lighting, lens, or creative vision.
Let’s dive into it!
Table of Contents
Why Camera Settings Matter in Portrait Photography
You could have the most expensive gear in the world, but if your camera settings are off, you’ll never get the results you’re aiming for. Portraits are all about connection, expression, and storytelling.
Your settings control:
Depth of field (how much of your image is in focus)
Exposure (how bright or dark your image is)
Sharpness (are the eyes tack-sharp or slightly soft?)
Mood and feel (a wide open aperture gives a dreamy look; a tighter one can make things feel more documentary)
So let’s break it all down.
The Holy Trinity: Aperture, Shutter Speed, and ISO
We’re going to start with the three pillars of exposure - because understanding how aperture, shutter speed and ISO work together is key to mastering portrait photography.
Aperture: Your Creative Superpower
My go-to setting when shooting portraits? Wide aperture - think f/1.8, f/2.0 or f/2.8. This creates that beautiful bokeh (aka that creamy background blur) that helps isolate your subject and draw the viewer’s eye straight to them.
Why I love it:
It creates a dreamy, flattering look.
It hides messy or distracting backgrounds.
It makes your subject pop like magic.
However, wide apertures aren’t always the answer.
Let me explain:
When to stop down (use a smaller/narrower aperture):
If you’re shooting a couple or group portrait and want everyone in focus (try f/4 or f/5.6).
If your subject is moving slightly and you need more room for focus error.
If you’re using a longer focal length and want just a bit more depth of field.
Example Settings:
Solo portrait with blurred background: f/1.8
Couple portrait: f/2.8 - f/4
Environmental portrait with background context: f/5.6 - f/8

Shutter Speed: Keep It Sharp
When it comes to shutter speed, the golden rule is: make sure it’s fast enough to avoid camera shake and subject movement.
My typical rule of thumb:
Try to use 1/125 sec or faster for handheld portraits.
If your subject is moving (e.g., kids, candid shots), go 1/250 or faster.
If you’re using a long lens (e.g., 85mm or 200mm), your shutter speed should be at least as fast as your focal length - for example, 1/200 for a 200mm lens.
Example Settings:
Studio portrait with still subject: 1/125 sec
Outdoor natural light, candid moment: 1/400 sec
Portrait with subtle motion (hair blowing): 1/500 sec

ISO: Don’t Be Afraid of It
ISO is your camera’s sensitivity to light. In perfect lighting, you want to keep ISO as low as possible - usually ISO 100-400 - for the cleanest images.
But modern cameras are brilliant at handling higher ISOs, so if you need to raise it to get a fast shutter speed or shoot indoors, go for it. It's rare I need to do it but I’ll happily push my ISO up to 1600 or 3200 if it's absolutely needed for natural light portraits - this tends to be for portrait sessions that take place just after sunset, in the early evening (to get by without having to use flash), or just during generally low-lit environments.
Example Settings:
Bright daylight: ISO 100-200
Indoor window light: ISO 400-800
Low light or golden hour: ISO 800-1600

My Favourite Portrait Photography Modes
If you’re just getting comfortable with manual settings, Aperture Priority Mode (A or Av) is an absolute gem. It lets you control the aperture, and the camera will automatically adjust the shutter speed to match the exposure. Super handy for outdoor or fast-moving shoots.
For full control and fine-tuned exposure, I shoot Manual Mode 95% of the time - Auto ISO is useful sometimes when the light is changing rapidly though I rarely ever have to rely on this.
Autofocus Settings for Perfectly Sharp Eyes
Nailing focus on the eyes is crucial in portraiture.
Here's how I set my autofocus for success:
Use Single Point AF (not wide area!) to place the focus point directly over the eye.
Use Eye AF if your camera has it - it’s brilliant.
Always recompose carefully if you're focusing and then shifting your frame.
AF-S/One-Shot AF for still subjects, AF-C/AI Servo for moving ones.
Pro Tip: Always zoom in and check your focus after taking a shot. Nothing worse than finding out later that the nose is sharp but the eyes are soft!

White Balance, Picture Styles & Other Bits That Matter
Portraits live and die by their tones and colours.
Here’s what else I dial in:
White Balance: Set manually if possible. Use Daylight, Cloudy, or set Kelvin (e.g. 5200K). Avoid Auto White Balance (AWB) when consistency matters.
Picture Style/Profiles: If shooting JPEG, use Portrait style for softer tones and better skin colours. If shooting RAW (and I hope you are!), this can be changed in post.
Metering Mode: I prefer Evaluative/Matrix Metering for balanced exposure, but I sometimes switch to Spot Metering if lighting is tricky.
Lighting Considerations
Your camera settings are only as good as the light you’re working with.
For portraits:
Use soft, diffused natural light whenever possible (window light, golden hour).
In harsh sunlight? Find shade or use a diffuser.
Don’t forget about reflectors - they’re cheap and magic.
In studio? Match your shutter speed to your flash sync speed (usually 1/160 sec or 1/200 sec) and set aperture and ISO accordingly.

Lens Choice & How It Affects Your Settings
I love shooting portraits with:
85mm f/1.8 - classic look, dreamy bokeh, perfect for headshots.
50mm f/1.4 or f/1.8 - versatile and brilliant for half-body or environmental shots.
35mm f/1.4 or f/2 - great for full-body or storytelling scenes.
Your lens affects your depth of field, so keep that in mind. A 35mm at f/2.0 gives you more in focus than an 85mm at f/2.0 at the same distance.
Real-World Portrait Setting Examples
Let me break it down with a few real-life setups:
Outdoor Golden Hour Portrait
Aperture: f/1.4
Shutter Speed: 1/8000 sec
ISO: 100
Lens: 35mm
Light: Naturally backlit with low sunset
Resulting Image:

Indoor Natural Light Portrait by Window
Aperture: f/2.2
Shutter Speed: 1/400 sec
ISO: 400
Lens: 50mm
Light: Natural window light
Resulting Image:

Environmental Portrait (Workplace, Wider Scene)
Aperture: f/4
Shutter Speed: 1/160 sec
ISO: 200
Lens: 35mm
Light: Ambient, bounced flash fill
Resulting Image:

My Final Thoughts: There’s No One-Size-Fits-All
Look, portrait photography isn’t about rules - it’s about making conscious choices that fit your creative intention. I often lean into wide apertures and naturally lit outdoor locations because I love that dreamy, lifestyle-inspired and subject-isolated look. But there are absolutely times when a deeper depth of field - and/or an indoor location or studio shoot - serves the story better.
The goal is to know your tools, understand the effect each setting has on your final image, and make choices that elevate your subject. Experiment, review, learn, repeat. That’s how you grow.
And remember: it’s not about being perfect - it’s about capturing something real.
FAQs
What setting is best for portrait photography?
The best setting for portrait photography if not shooting in manual mode typically includes Aperture Priority mode (A or Av), a wide aperture (like f/1.8 to f/2.8 for that dreamy background blur), a moderate ISO (100–400 in good light), and a fast enough shutter speed to avoid blur (usually 1/125s or faster). These settings help you achieve sharp, flattering portraits with soft backgrounds.
What shutter speed is best for portraits?
A good rule of thumb is to use 1/125s or faster for handheld portraits to avoid camera shake. If your subject is moving (like kids or candid street portraits), bump it up to 1/250s or even 1/500s. Using a tripod? You can get away with a slower shutter speed if the subject stays still.
What ISO should I use for portrait photography?
Keep ISO as low as possible to reduce noise - ISO 100-400 is perfect for daylight or well-lit indoor setups. In lower light, increase ISO as needed but balance it with aperture and shutter speed. Many modern cameras handle ISO 800-1600 beautifully, so don’t fear bumping it up when necessary.
What is the best aperture for portrait photography?
For that classic portrait look with gorgeous background blur, aim for a wide aperture like f/1.2 to f/2.8. It beautifully isolates the subject from the background. That said, if you’re shooting groups or want more of the face in sharp focus, you might prefer f/4 to f/5.6 for a bit more depth of field.
Should I shoot portraits in RAW or JPEG?
Always shoot in RAW if you're serious about portraits. RAW files retain much more data and allow for more control in post-processing - perfect for tweaking skin tones, exposure, and shadows. JPEG is fine for quick shots or social media, but RAW is your best friend for professional results.
What white balance should I use for portrait photography?
If you're not colour grading in post, set your white balance manually based on your light source: Daylight, Cloudy, Shade, Tungsten, etc. Or use a custom white balance for precise tones. Shooting in RAW gives you the flexibility to adjust white balance after the fact, so don’t stress too much during the shoot.
What is the best focus mode for portraits?
Use Single Shot AF (AF-S or One-Shot AF) for still subjects, and Continuous AF (AF-C or AI-Servo) for moving ones. Most importantly, use single point AF to precisely focus on the eyes - it’s the key to a compelling portrait!
What metering mode should I use for portraits?
Evaluative or Matrix metering usually works great for portraits as it considers the entire scene. If you're in tricky lighting (e.g., strong backlight), try spot metering to expose for the subject’s face, especially if it’s much brighter or darker than the background.
Should I use flash for portrait photography?
Flash can be brilliant when used creatively! Natural light is lovely, but adding a fill flash, reflector, or off-camera flash can help lift shadows and add catchlights to the eyes. Just avoid harsh, direct flash straight from the camera - diffused or bounced light works best.
What lens settings are best for portrait photography?
Use a telephoto or mid-range focal length like 50mm, 85mm, or 135mm to avoid distortion and create flattering perspective. Combine this with a wide aperture (f/1.2-f/2.8), and you're onto a winner.
How do I get a blurry background in portraits?
To achieve a beautifully blurred background (bokeh), use a wide aperture (e.g., f/1.8), a longer focal length, and increase the distance between your subject and the background. The closer you are to the subject, the stronger the blur too!
Should I use manual or auto settings for portrait photography?
Both can work, depending on your confidence and the scenario. Manual mode gives full control, but Aperture Priority (A/Av) is a brilliant semi-auto mode for portraits, letting you control depth of field while the camera adjusts exposure.
How can I make sure my portraits are sharp?
Use a fast enough shutter speed, focus carefully on the eyes with single point AF, and avoid camera shake by keeping your camera steady. If you’re using a very shallow depth of field (e.g., f/1.4), precise focusing is even more crucial.
What picture style or colour profile is best for portraits?
If you're shooting JPEG, go for a Portrait picture style/profile which usually softens skin tones and enhances natural colour. If you're editing RAW, start neutral and adjust to your taste during post-processing.
What’s the best lighting setup for portraits?
Natural window light with a reflector is a great place to start. If using artificial light, try softboxes, umbrella lights, or ring lights for soft, flattering light. Keep the light source above and slightly to the side of your subject for a natural effect.


